Kami Help Center (Beta)

Kami Help Center (Beta)

Technical & License Information

How to configure optional Kami Companion feature Access

Guide on how to toggle optional Kami Companion feature access through your Permissions dashboard.

Updated 3 months ago


Open your Feature Permissions

You can configure optional Kami Companion feature access by going to your Feature Permissions dashboard and toggling on the options under the Extensions section. Click the button below to go to your dashboard.


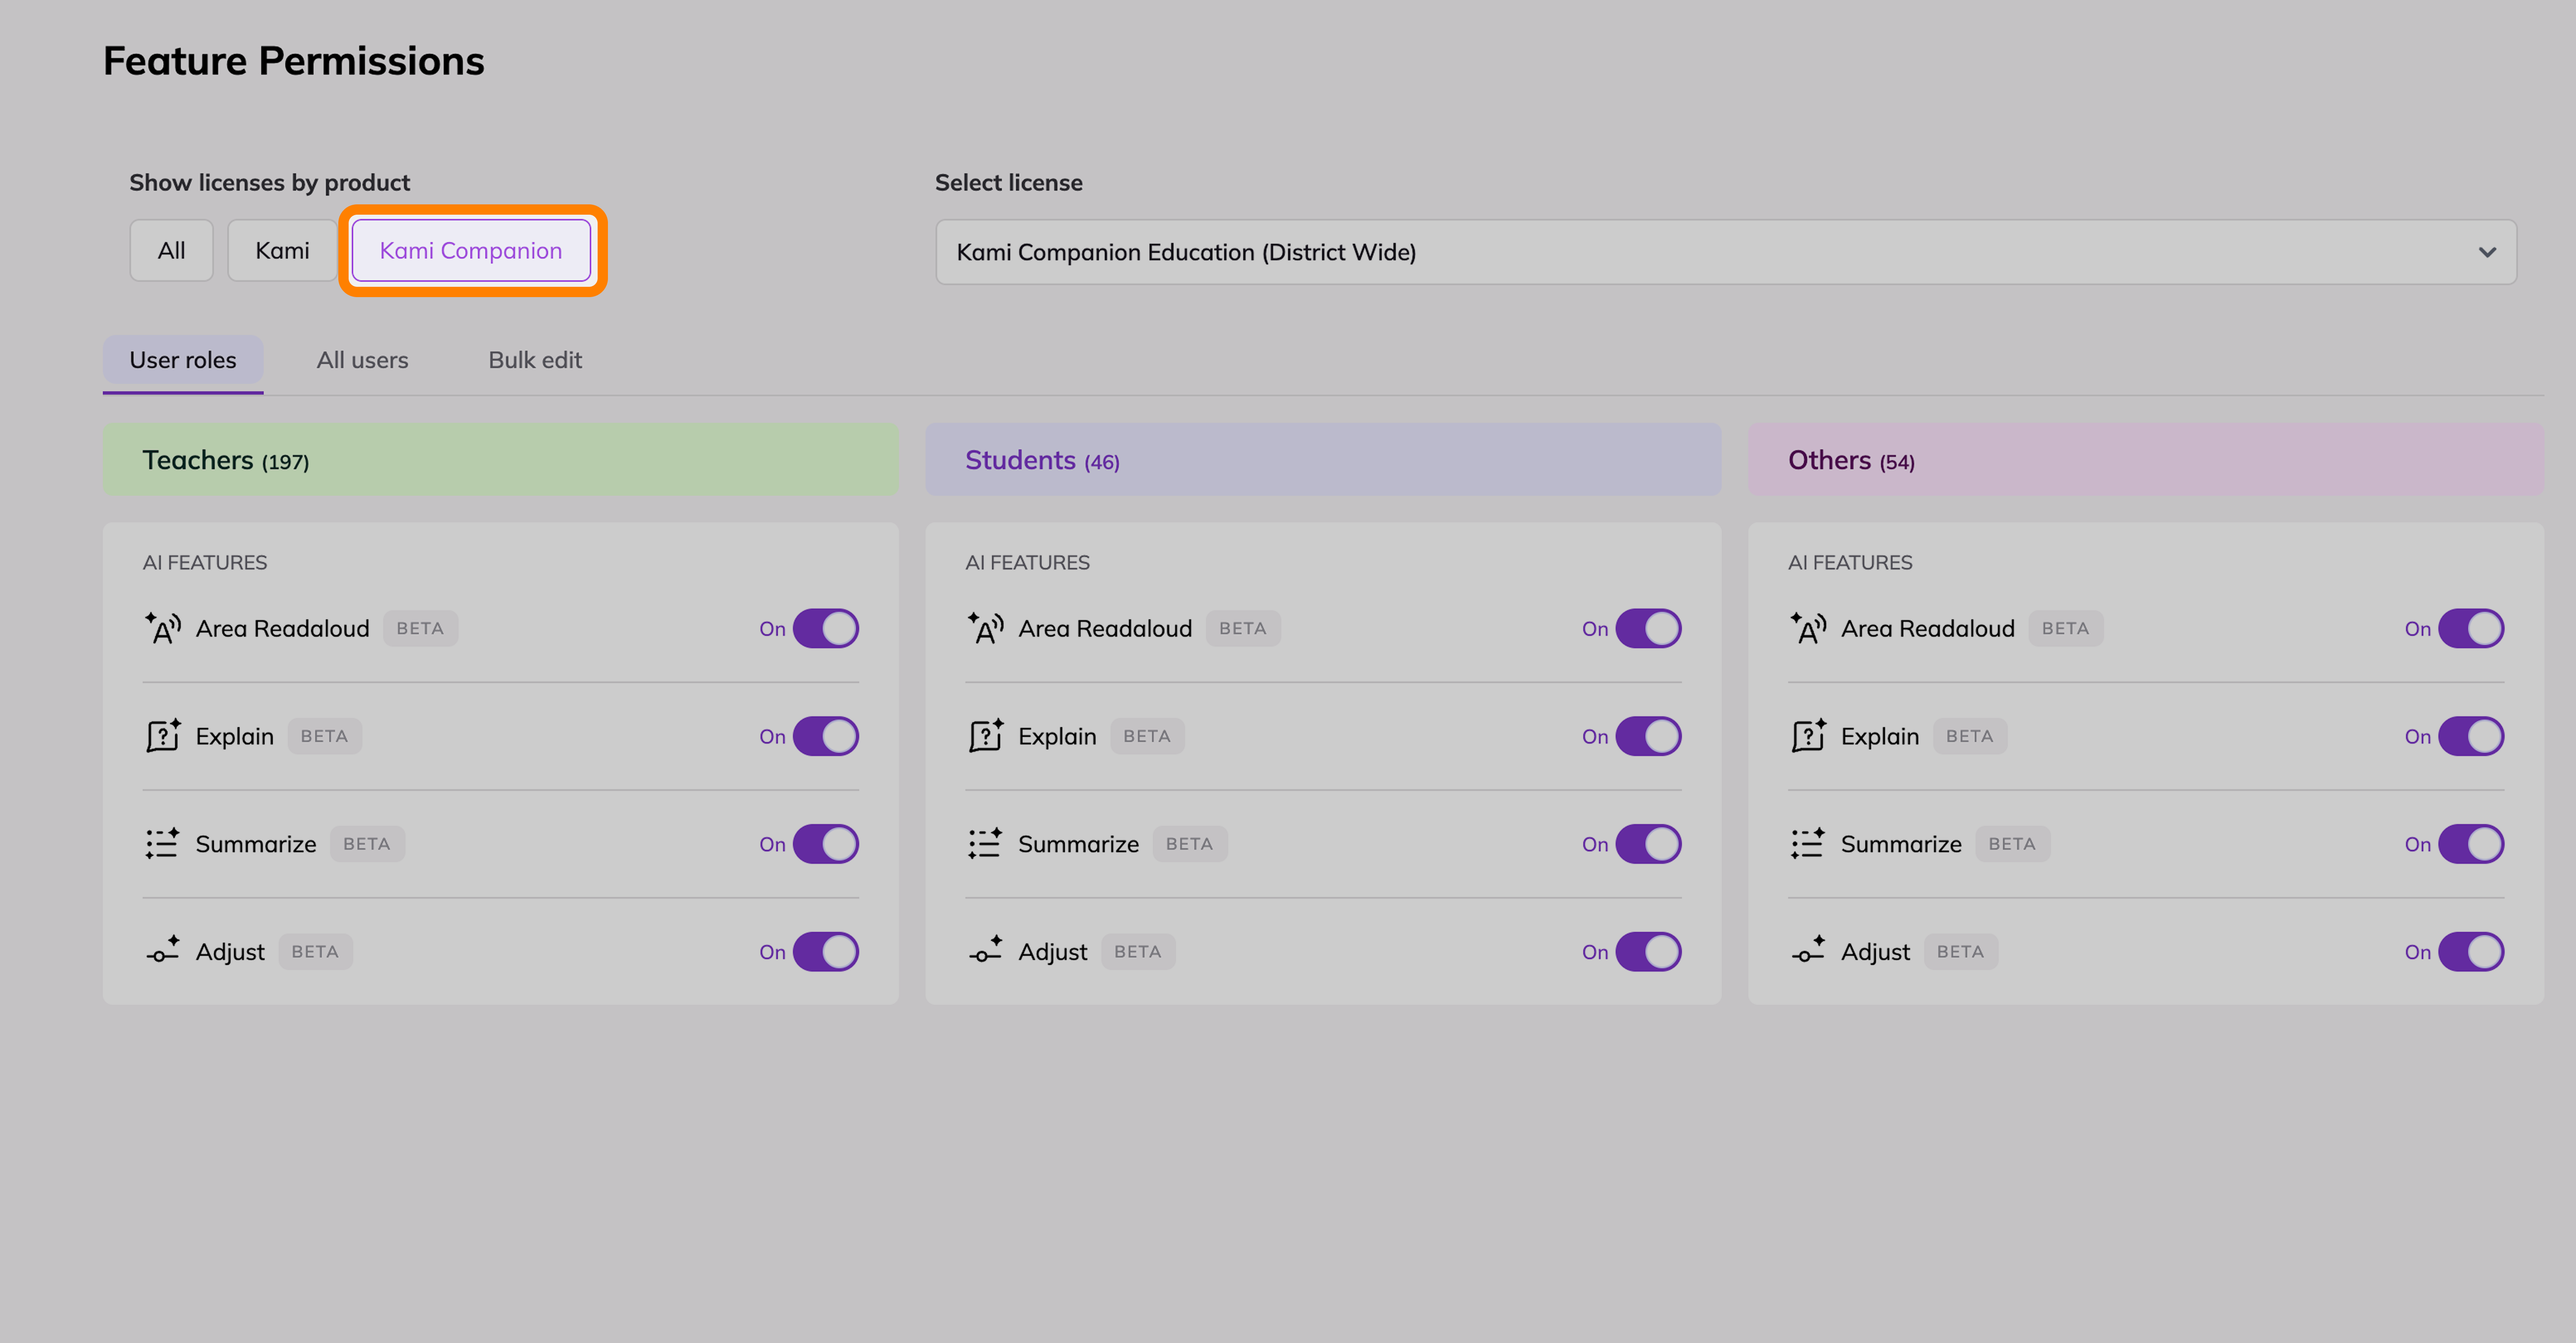
Select your Kami Companion License

To view the optional feature list, you must select a valid "Kami Companion License." To filter your licenses to only show Kami Companion, click the "Kami Companion" button in the "Show licenses by product" section, as shown below:

Show Companion Licenses.png

Manage the feature permissions for your license

You can manage your Kami Companion feature permissions in a few different ways. See what works best for you with the options below:

Image 
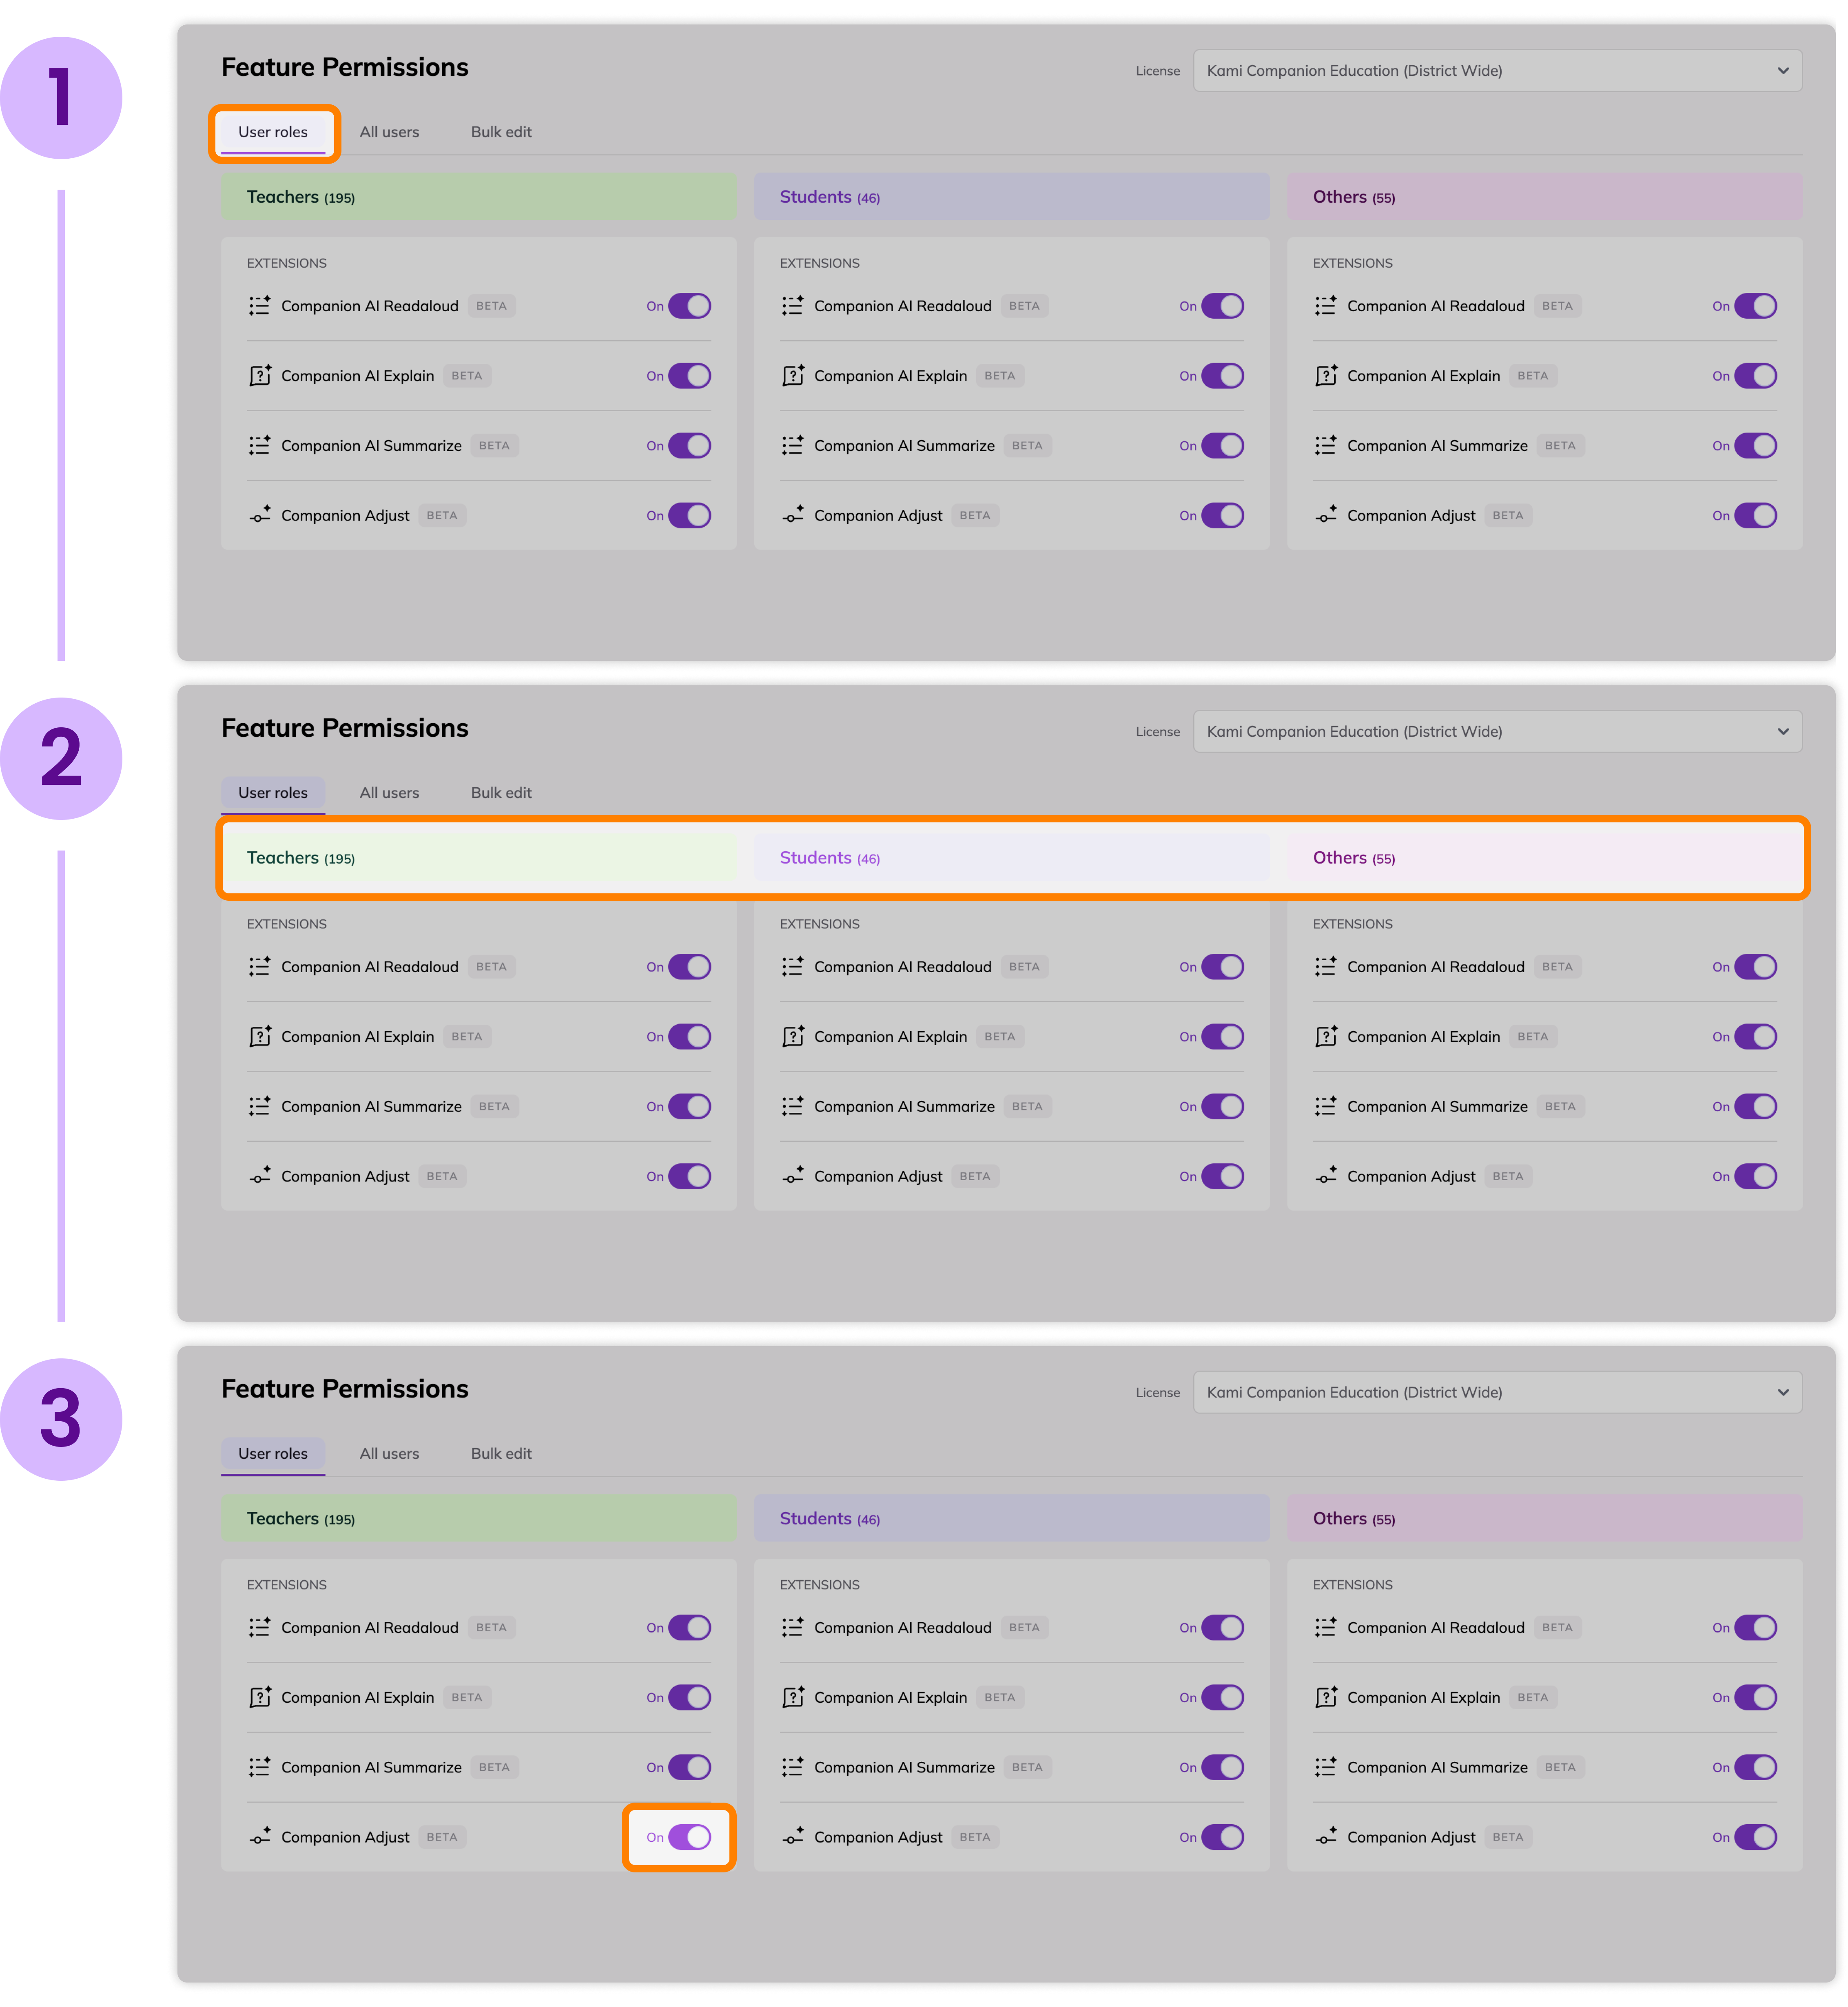
User Role Activation

This option is the quickest and easiest way to turn on Kami Companion. Follow the steps below to activate for specific groups based on their account role (Teacher, Student, or Other).

User roles Toggle.png
1
Go to the User Roles menu
Click the "User Roles" tab
2
Choose an account role to edit
Select between Teachers, Students, and Other.
3
Toggle the optional features
Choose the optional feature you'd like to turn on and click the "Toggle"

Image 
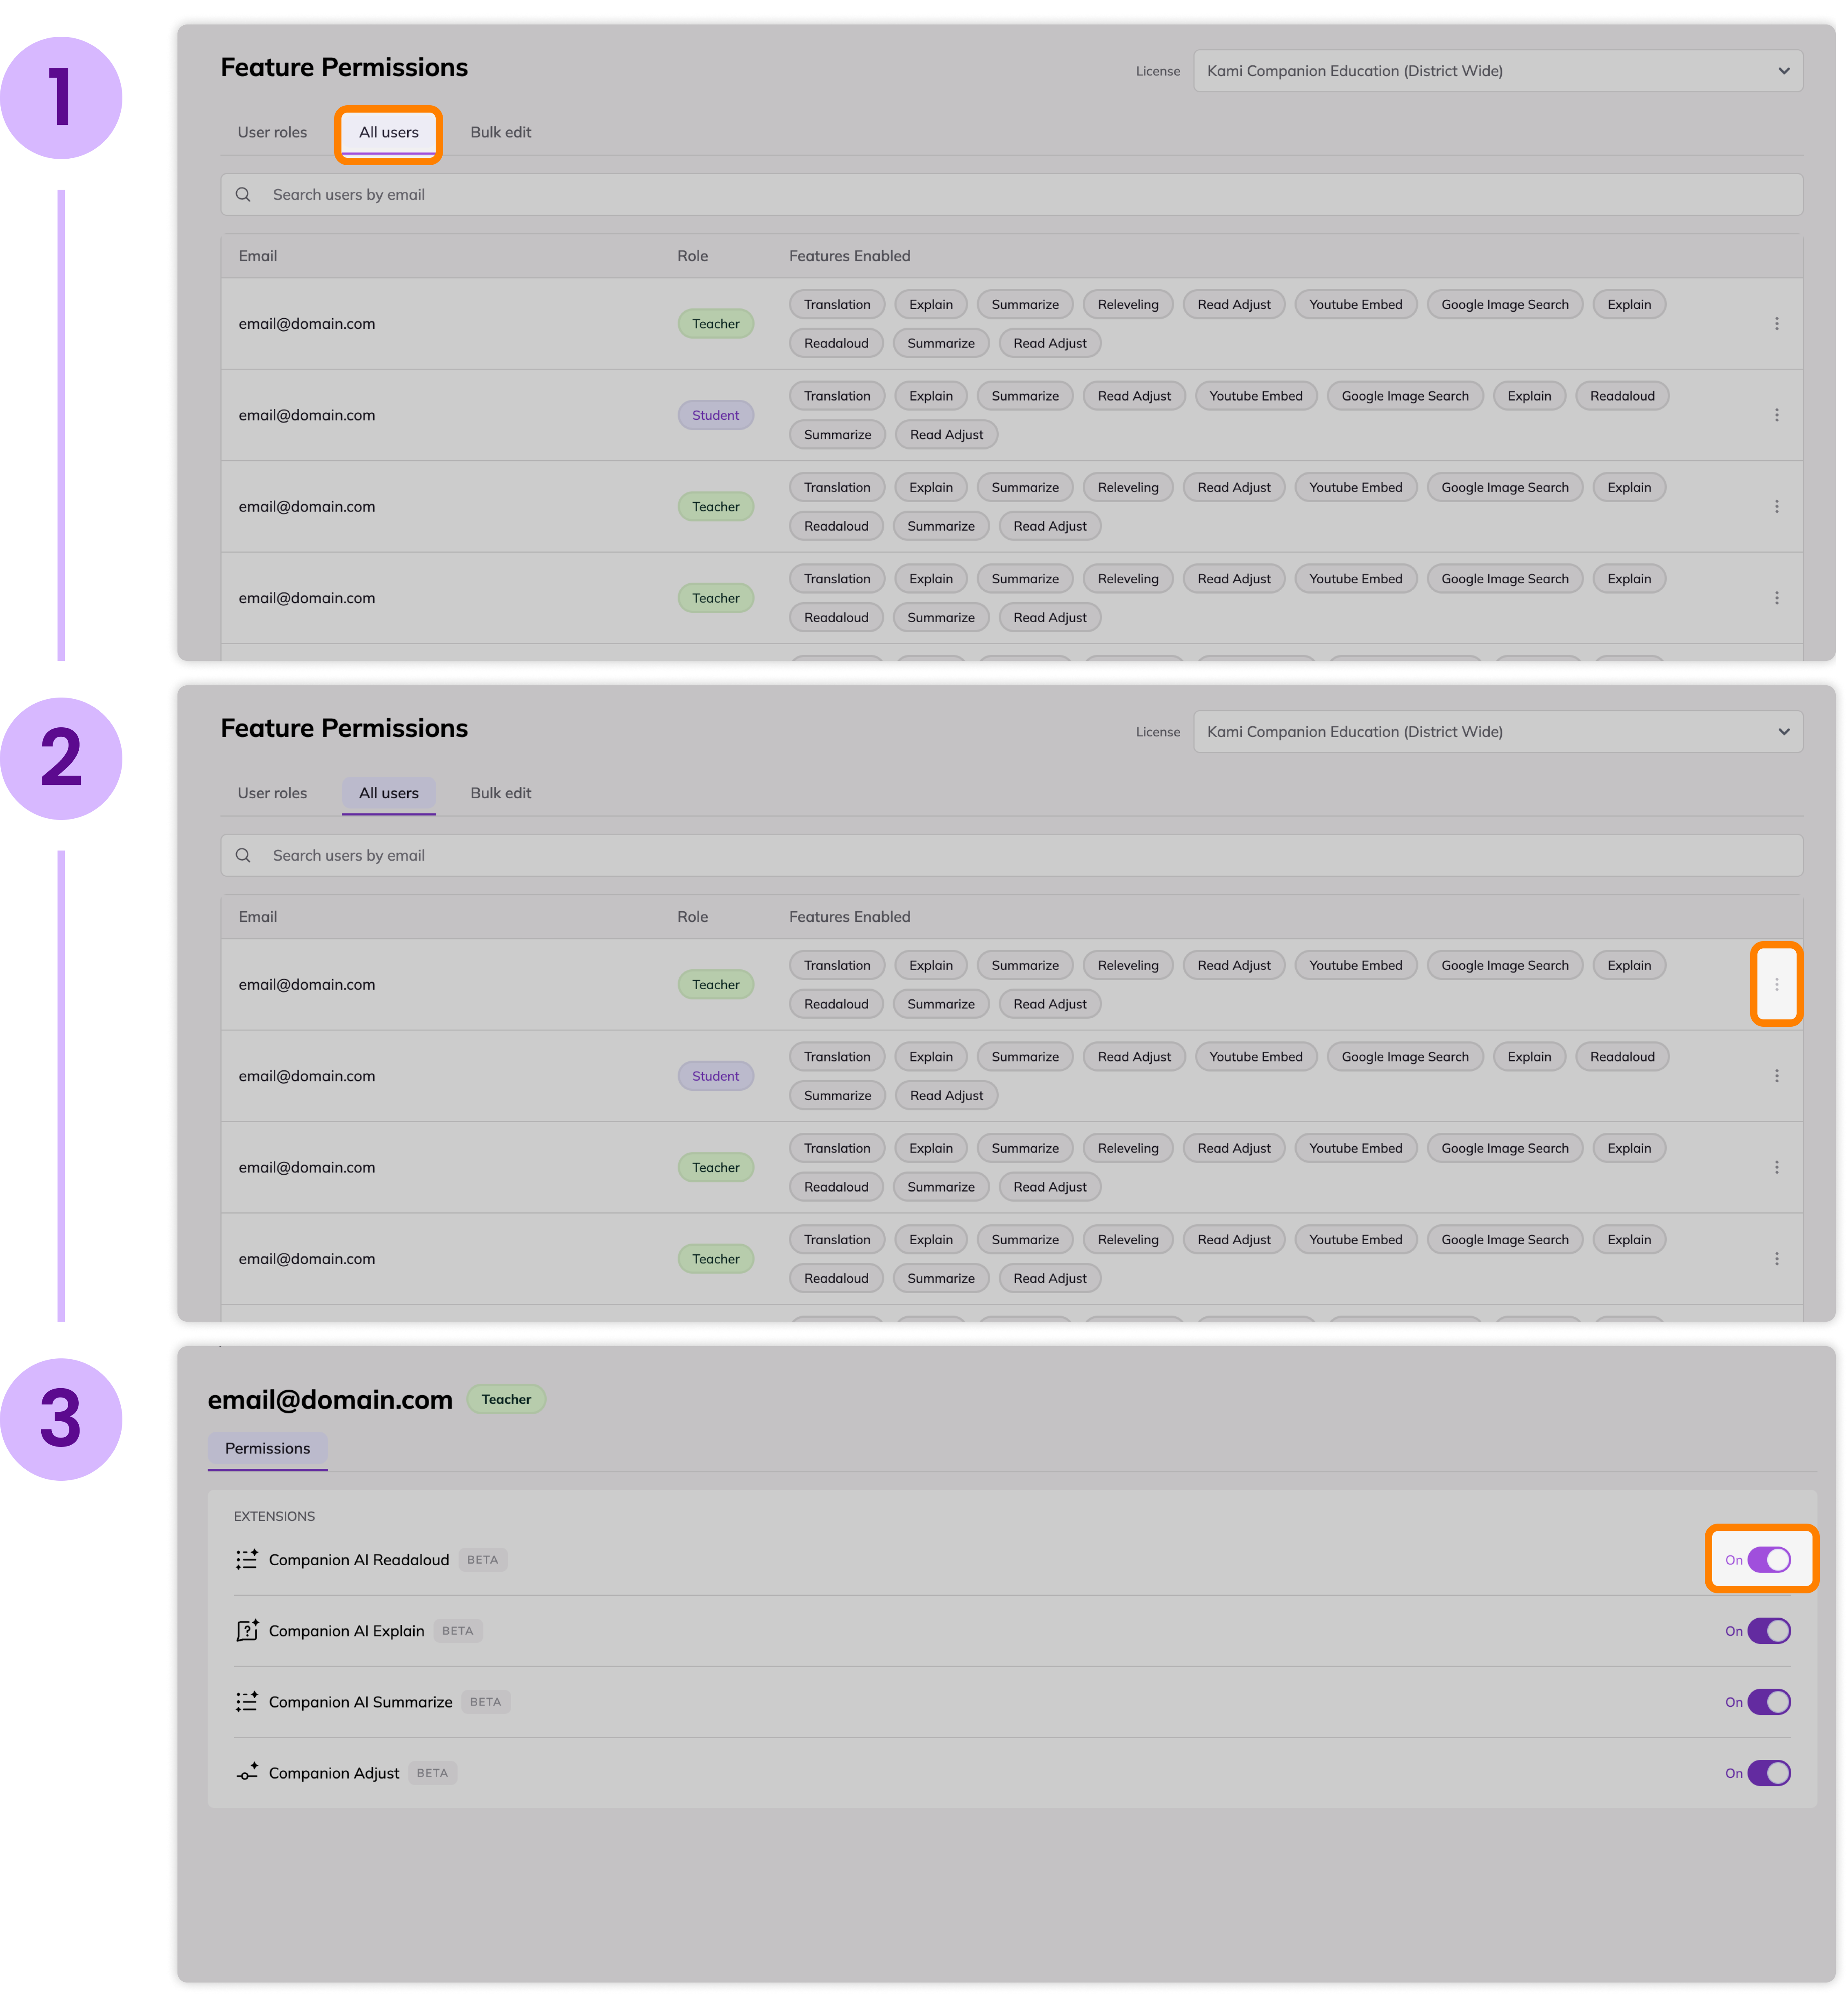
Individual User Activation

This option gives you more control over which users get access to optional features. Follow the steps below to activate Kami Companion for individual users:

All users Toggle.png
1
Go to the All users menu
Click the "All users" tab
2
Open the user's permissions list
Find the user you want to give/revoke access to, then click the three dots next to the user's email and select "Manage User's Permissions"
3
Toggle permissions
Use the "Toggle" to turn features on/off for that user.

Image 
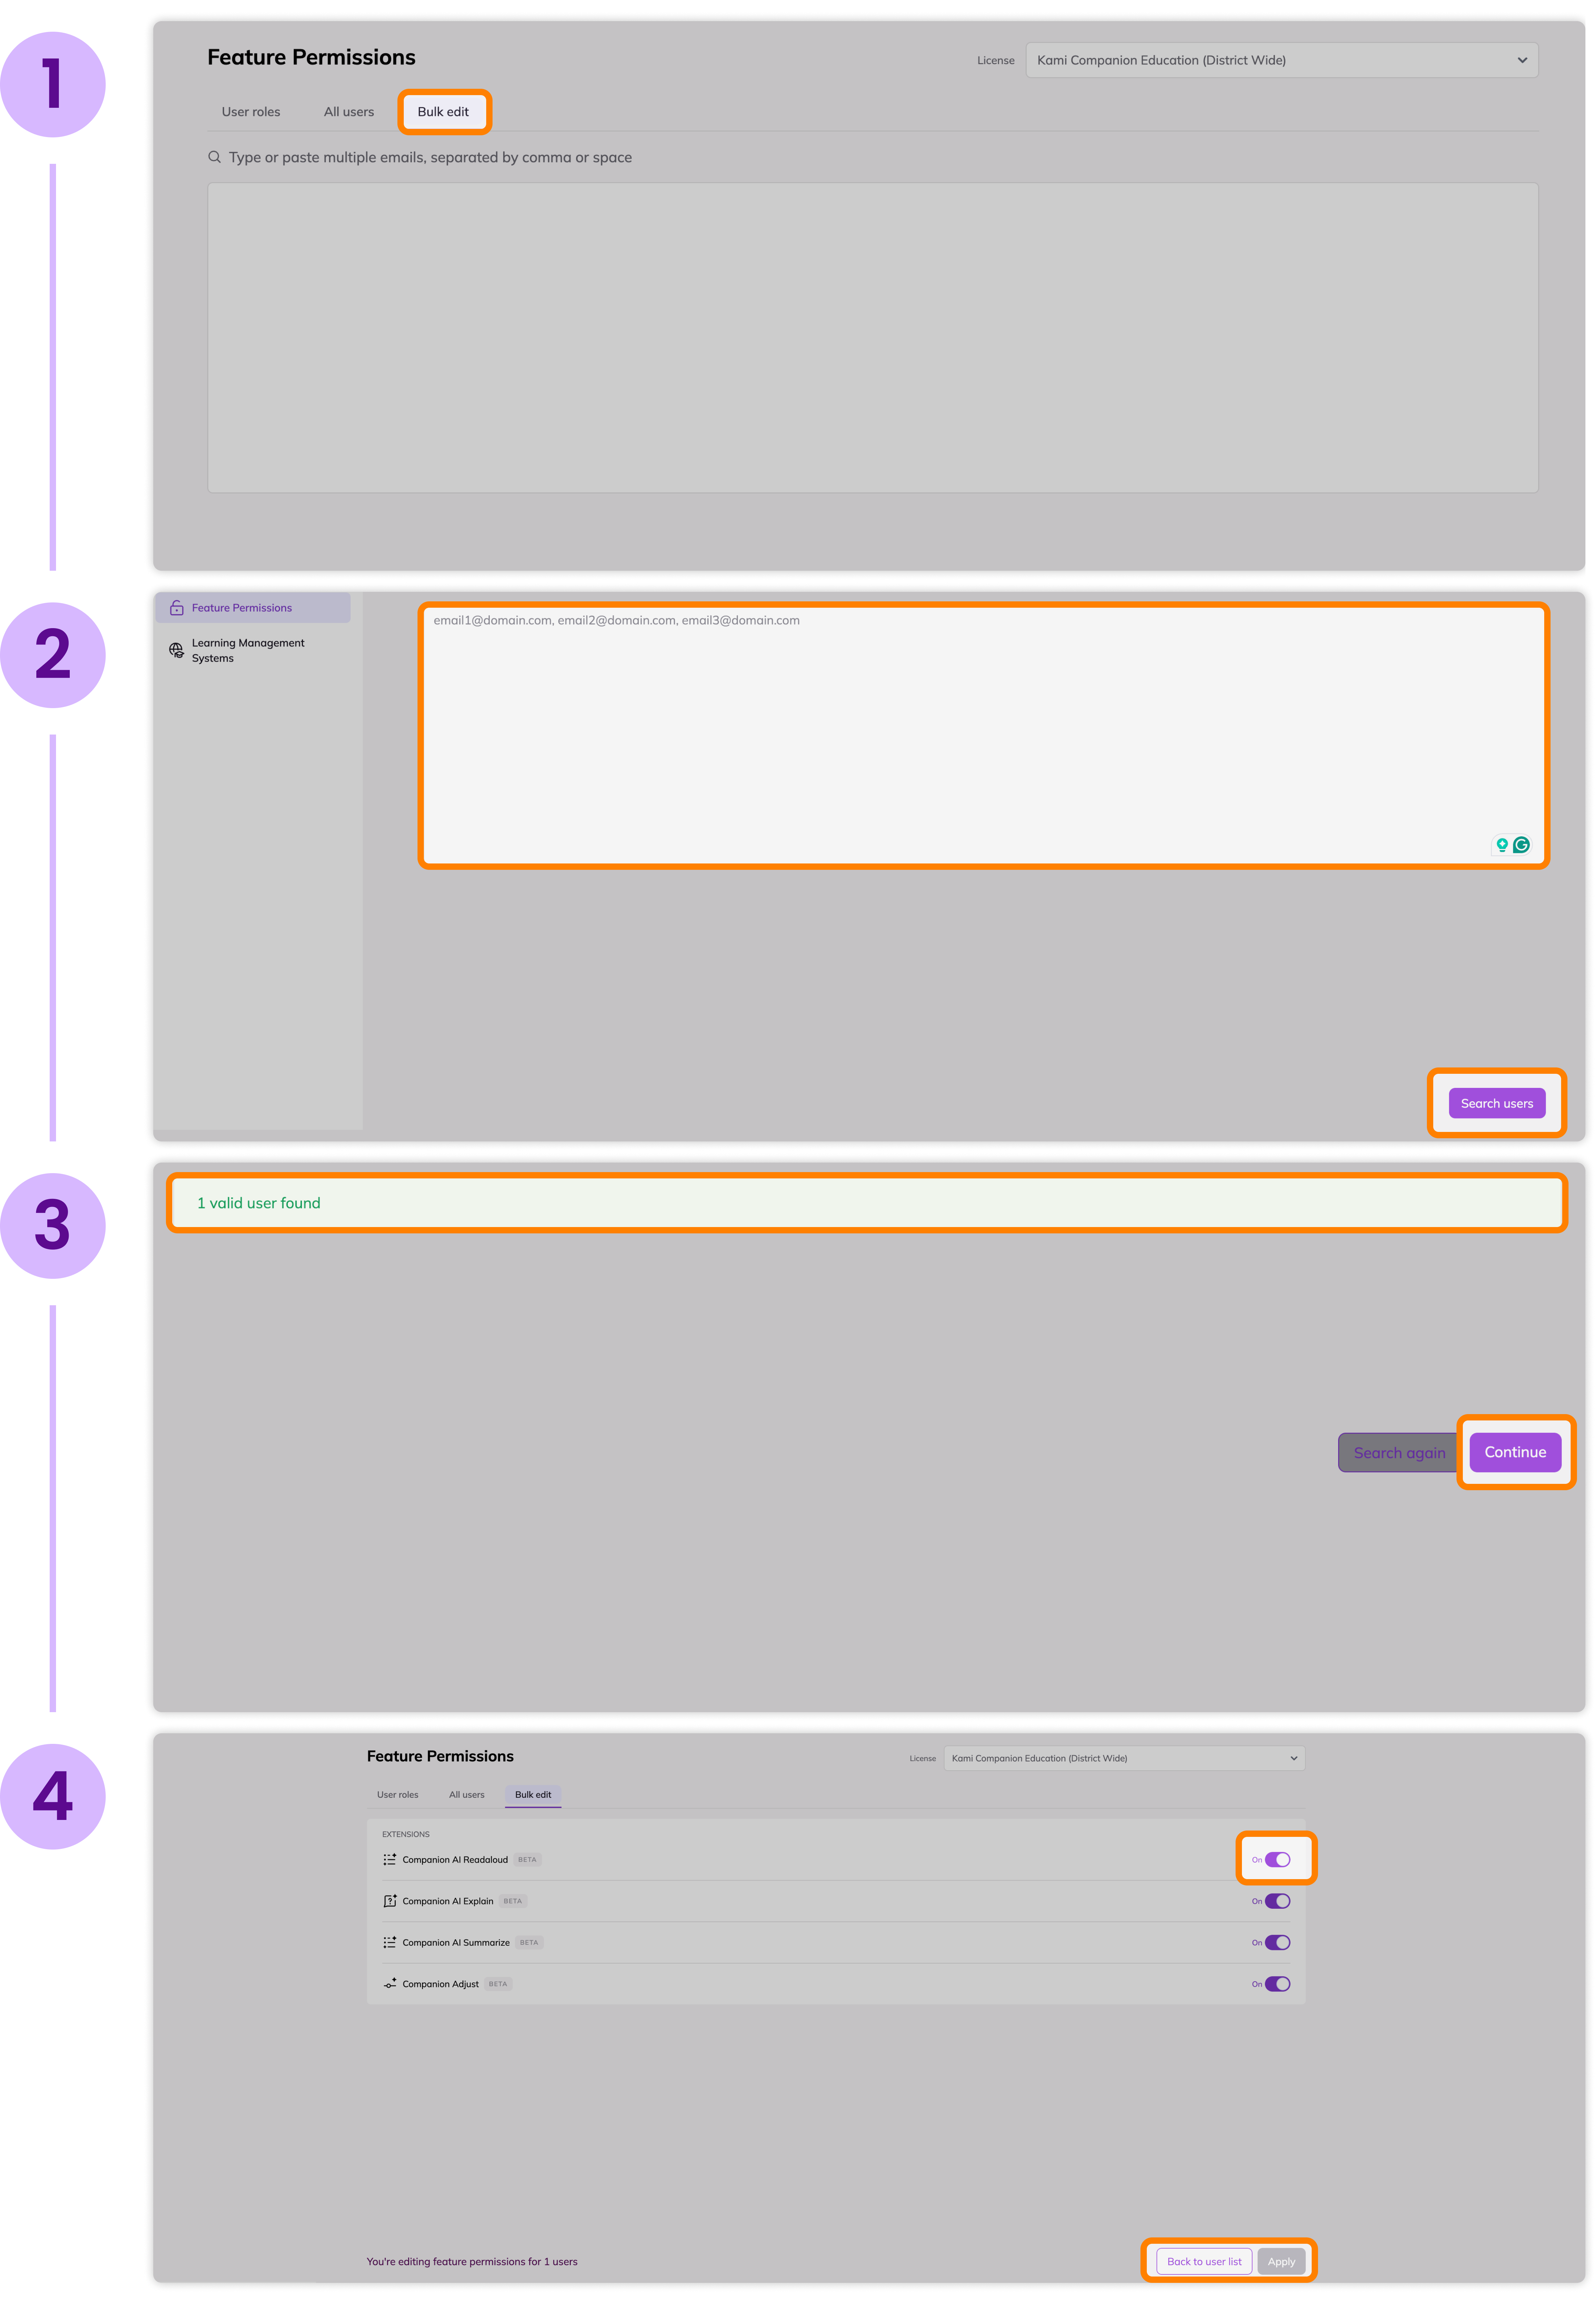
Bulk User Activation

This option is similar to the previous method, but the only difference is that it lets you change the permissions for a list of users. Follow the steps below to activate Kami Companion for a group of users:

Bulk edit toggle.png
1
Go to the Bulk edit menu
Click the "Bulk edit" tab
2
Search for users
Put your user list into the text box (We recommend separating each email with a comma for the best experience.) then click the "Search users" button
3
Open the permissions list
You should see a green message indicating how many users were found if the search is successful. Simply Click "Continue" to open the permissions list.
4
Toggle permissions
Toggle the features you want to turn on/off and click the "Apply" button to push those changes to your users.

Previous

How to update Kami Companion

Next